Hi All. It's the last weekend of the summer. I've been doing some last minute "sprucing-up" - at home, on the blog and in the garden.
I've picked a meal's worth of these every second day for the last 2 weeks. Oh! They taste so good when they come out of your own garden!
I just happen to have the camera nearby when this fellow paid a visit to my garden one day earlier this week.
And these geraniums have finally responded to the fertilizer I gave them 2 weeks ago. One small plant has blossomed into a spectacular view!
Do you like the new fall feel to my blog? I needed something new and fresh and I think my new header has captured the feeling of the upcoming season very well.
Now onto some changes on the home front!
I have had this bench in my front entry for just over 2 years now. There is a basket underneath for each child and they (reasonably) contain all of their daily gear - hats, sandals and runners.
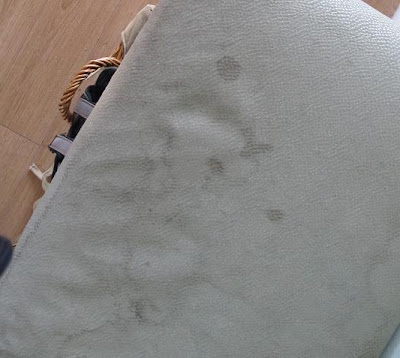
I recovered this bench 18 months ago with a pale green fabric that matched my walls perfectly. It looked lovely for about 2 minutes until the sippy cups, muddy boots and sticky hands destroyed it. Hubby tried on several occasions to use a carpet cleaner to remove the stains but unfortunately the marks just spread out and looked worse.
 |
| Ewwwwww!! |
Time for a makeover - part one!
Ten years ago I fell in love with a beautiful Laura Ashley print fabric. At the time, we were building our first home and I planned on using it as the inspiration for one of the rooms. However, after I returned home with 6 metres of it, hubby quickly vetoed it for being "too flowery" and "too pretty." So, into my fabric stash it went. It has moved three times with us, always hoping that one day, dear hubby would allow me to use it.
And now, ladies and gentlemen, that time had come.
So, using my stapler and screwdriver, my ugly bench became......
..... my lovely new floral- covered bench!!
 |
| Isn't this a gorgeous print?? |
Now to do something with the far-from-pretty baskets.....
They function very well - they hold a ton of stuff and fit perfectly under the bench. However, the mossy green liners were dingy and ripped and they could use a real lightening and brightening!
Vintage White spray paint to the rescue!!
 |
| A lot less shabby and a lot more chic! |
Now to label them for each child.
I went to Michaels hoping to find some tag-shaped wooden cut-outs. No luck. So instead I brought home these wooden FOOTBALLS and had hubby drill holes them. I also picked up wooden letters in the initials of my 3 children.
(Yes my kids' initials really are A, B & C. People find it funny that my hubby and I, both teachers, have kids with these initials. It really was a fluke - completely unplanned!)
I painted each "football" the same green as my walls. The initials were painted in our traditional family colours - Bryn's stuff is always blue, Afton's is always pink and Camden's is always yellow!
I dry-brushed some white paint over top to create am "aged" look then tied some twine to each end to help fasten them to the baskets.
TA-DA!!
Don't they look so much better?
And each basket distinguishable from the next.
I took some time to this out the basket clutter - removing broken flip-flops and out-grown shoes, and re-stocking the hats and sandals for the upcoming days of school.
And you know what? Hubby doesn't mind my fabric choice one bit. Really, how could not love pink roses, blush coloured pinks, and white lilies sprawling across the most perfect shade of aqua you have ever seen?
 |
| Just look how cute my daughter's sparkly shoes look next to it. And my new raspberry coloured purse - lovely!! |
Now the next thing....should I paint my picture frames white or leave them wood-toned? I have lots of dark wood in this room mixed with many light fabrics. Hmm.....what do you think??


